Far Cry 3 is an in-depth first person shooter with Open World Gaming, that allows the gamer to explore a world rather than just move around a narrower ‘corridor first person shooter’ area.
 The game uses the new Dunia 2 game engine with Havol Physics. The engine was originally from Crytek.
Actually the game was originally developed by Crytek which sold the game to Ubisoft thereby gaining its financial independence and allowing it to move to Crysis and other titles.
This new engine provides volumetic lighting, improved fire, much larger image maps, improved non-scripted AI, better water, and a new animation system. The characters also benefited from the engine update, by the new addition of a new renderer, which was rewritten about a year ago.
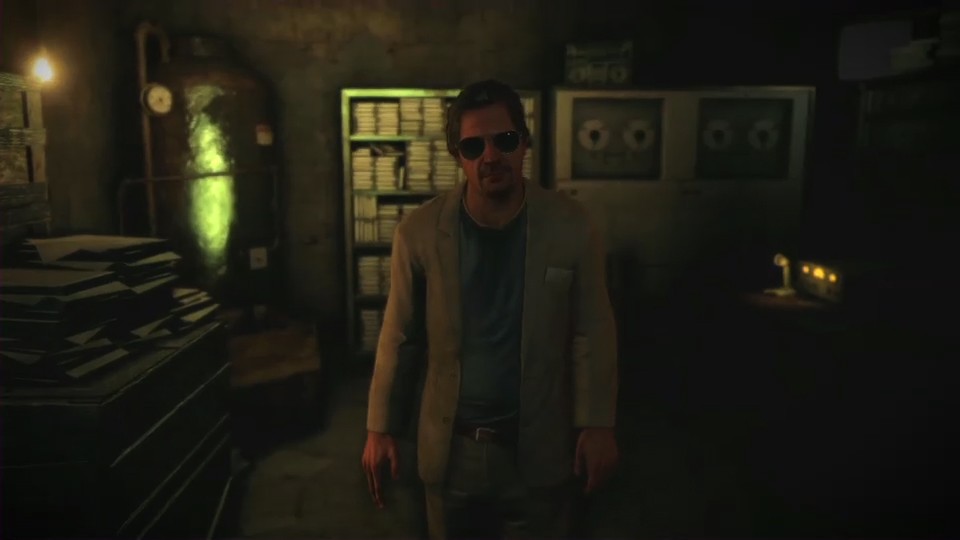
 To support the story line, motion capture was recorded extensively, lead by actor Michael Mando who plays Vass. “There was actually a big cast of characters,” Kieran O’Sullivan, Technical Art Director on the project, told fxguide. For Far Cry 3 more than 10,000 animations were required as the show had a very high animation count.
The team used Motion Builder from Autodesk with the extensive motion capture. Actors were cast based on having the correct facial structure for motion capture and later retargeting. Actors were cast based on having a similar fundamental facial structure, which is based on a combination of jaw, check bone, eye, and nose positions/ratios.
In total there are about 15 primary characters, and NPC there are three factions – the healthy people of the island, the down trodden islanders, and the pirates.
Key workflows had to be worked out to handle the vast amount of animation required.

The team captured
The ‘player’ is also on the stage and motion captured, but they do not have a camera facing the actor but looking out on the scene so the team can ‘preview’ the first persons point of view ‘live’.
Eye movements are very critical to a performance. As the eyes can’t have markers, a special program was developed for eye matching and face capture; Mocam. The Ubisoft system works by having the actor do a set of pre-determined eye movements and then the head mounted camera does effectively pattern matching to determine that the actors say look left is actually that, based on already having a key looking left glance recorded. This program improves based on the amount of ‘information’ provided in the form of pose references.
All the movements were passed from the motion capture stage to Motion Builder, which is at the core of the animation pipeline. Initially the motion capture is aiming to be as faithful to the actors performance as possible.
Motion Builder is used for
The Ubisoft technology group used a 2D tracking software extension to do the face tracking, based on the fixed helmet camera and the prerecorded key facial poses from the actor. The system then pattern matches this into pose animation. The camera is an infrared camera as it gets around shadowing. A key aspect of the camera is capturing at least 60 frames per second, to not miss eye blinks and subtle eye movements.
Once this facial posing is resolved, using an SDK Ubisoft has their own FaceBuilder plugin from the Ubisoft technology group. This retargets the capture poses to the model face. As the model faces have major similarities this gets the team about 80% complete, and the software then allows an artist to tweak and polish the animated performance.
But a separate team needed to build the models that have to be brought into Motion Builder to animate. “Our base package was 3D Max,” O’Sullivan says. “All the humans are built on the same base skeleton, but with different heads.”
 The game uses the new Dunia 2 game engine with Havol Physics. The engine was originally from Crytek.
Actually the game was originally developed by Crytek which sold the game to Ubisoft thereby gaining its financial independence and allowing it to move to Crysis and other titles.
This new engine provides volumetic lighting, improved fire, much larger image maps, improved non-scripted AI, better water, and a new animation system. The characters also benefited from the engine update, by the new addition of a new renderer, which was rewritten about a year ago.
Motion capture
 To support the story line, motion capture was recorded extensively, lead by actor Michael Mando who plays Vass. “There was actually a big cast of characters,” Kieran O’Sullivan, Technical Art Director on the project, told fxguide. For Far Cry 3 more than 10,000 animations were required as the show had a very high animation count.
The team used Motion Builder from Autodesk with the extensive motion capture. Actors were cast based on having the correct facial structure for motion capture and later retargeting. Actors were cast based on having a similar fundamental facial structure, which is based on a combination of jaw, check bone, eye, and nose positions/ratios.
In total there are about 15 primary characters, and NPC there are three factions – the healthy people of the island, the down trodden islanders, and the pirates.
Key workflows had to be worked out to handle the vast amount of animation required.

Normally only first person ‘players’ are on the motion capture stage.
- body
- finger
- face, via a special infra red helmet
- audio – via a mic in the helmet
- props
- video reference – and it with everything else was time coded.
The ‘player’ is also on the stage and motion captured, but they do not have a camera facing the actor but looking out on the scene so the team can ‘preview’ the first persons point of view ‘live’.
Eye movements are very critical to a performance. As the eyes can’t have markers, a special program was developed for eye matching and face capture; Mocam. The Ubisoft system works by having the actor do a set of pre-determined eye movements and then the head mounted camera does effectively pattern matching to determine that the actors say look left is actually that, based on already having a key looking left glance recorded. This program improves based on the amount of ‘information’ provided in the form of pose references.
Technical character workflow
Like the mocap actors, all the animated character faces also had similarity, they all have the same model topology, with matching eyes, lips and nasolabial folds, (commonly known as “smile lines” or “laugh lines”). This helps with retargeting. But as O’Sullivan explained he really likes asymmetrical faces. “I love asymmetry on a character – it makes them feel more alive.” So the system allows for varying asymmetry.All the movements were passed from the motion capture stage to Motion Builder, which is at the core of the animation pipeline. Initially the motion capture is aiming to be as faithful to the actors performance as possible.
Motion Builder is used for
- retargeting
- editing
- retiming
- enhancing the capture
The Ubisoft technology group used a 2D tracking software extension to do the face tracking, based on the fixed helmet camera and the prerecorded key facial poses from the actor. The system then pattern matches this into pose animation. The camera is an infrared camera as it gets around shadowing. A key aspect of the camera is capturing at least 60 frames per second, to not miss eye blinks and subtle eye movements.
Once this facial posing is resolved, using an SDK Ubisoft has their own FaceBuilder plugin from the Ubisoft technology group. This retargets the capture poses to the model face. As the model faces have major similarities this gets the team about 80% complete, and the software then allows an artist to tweak and polish the animated performance.
But a separate team needed to build the models that have to be brought into Motion Builder to animate. “Our base package was 3D Max,” O’Sullivan says. “All the humans are built on the same base skeleton, but with different heads.”
Game Trailer
Rigging
“We had the same skeleton inside every character to save on animation memory and it made it really easy to just do one click import,” O’Sullivan notes.The facial rigs also had one click import, but there were 3 skeleton rigs for the face. “There was a cinematic level bone structure of 81 bones, and a lesser character rig of just 35 bones.” The skeleton rigs were:
- Narrative
- NPC (Non-player character) or bots
- NPC Morph (A morphable bone structure version to generate more visual variety).
When a face skeleton comes in it is already pre-rigged, but O’Sullivan explained to fxguide that “I spend at least a day or two changing all those bones around to be in the exactly right position for that character, to make sure every pose is tweaked exactly right for that character. We don’t just use one rig to drive every head, we use one base rig which we then tweak for each individual character which I think is very cool.”

Some bad guys – all characters start with the same rig.
Skinning tools
Ubisoft has special skinning tools that allow easy copy and paste of skin weights, which works with multiple selected objects. It also saves to a separate skin weights file, SKIN, and it is used by both Max and Maya teams at Ubisoft. This allows easy updating of skeletons, and cleans the files.
There are also special tools for facial skinning.
Both Max & Maya pipelines, but requires some custom tools
All the skinning was done in Max or Maya. All the cinematics were done in Motion Builder but with the higher quality rigs, and all the cinematic faces were skinned in Maya because of the ‘Paint weight tool’. But Maya does not have the Max style vertex weight tool, so a Ubisoft team TD build a version of that in Maya. So now both Paint Weight and Vertex weight tools are available to a Maya artist. It also allows the skin to be easily handed back to Max via the custom Skin format. This means the team uses FBX to move all the model and skeleton information between digital content creation tools (DCCs), but it uses a custom skin format to move the skin.
Facebuilder

Facebuilder 1.5 (in house tool)
The team uses a tool called Facebuilder, a toolset for building face poses using bones or blendshapes.
On Far Cry 3 faces were mainly handled with the Facial skin warp tool not using blend shapes as is commonly done.
A blend shape tool is normally a tool that will take exact duplicates of the original geometry that have been sculpted into a new shape and make a seamless transition between the two. This has many different uses including muscle bulges but the most common use is for facial expressions. It is a very simple tool and extremely powerful.
While Facebuilder is in Max, the team can animate in a lot of DCCs and so FBX is used along with a proprietary FBR custom file type, which contains the facial rig. This file can be imported into Max, Motion Builder, Maya or their own Mocam tool.The neck is part of the face rig and the face drives the neck. This is done not only so the animation of the face causes neck animation, but also so that there is a blending between the high res face and the lower resolution body, but this is only the case on the cinematic version of the characters.
To make the characters in the game more interesting the team references some interesting academic research, such as for the Character Dr. Earnhardt, as Marc Beaudoin, Technical Director on Far Cry 3, explained at GDC2012. The Doctor seems to be looking at the viewer – but also perhaps looking away, this is due to the use of shadowing on the eyes.

Click for larger version.
This references the work of Rob Jenkins Senior Lecturer at Glasgow University and his paper The lighter side of gaze perception (1997 Perception Vol 36).
In this image right, reproduced from the academic paper, at close range the eyes are looking to the left – yet from far away they are looking to the right.
You can test this by clicking to see a larger version and then look again at this smaller version.
Modeling and Rigging summary
- Start with motion capture from an actor who has a predetermined face structure.
- From motion capture the next stage is Motion Builder, but that needs an asset.
- There is a tool from importing the facial rig, skeleton and skinning, it transfers skin weights from another character 1:1 vertex matching.
- Use FBX to move that file to Maya to use Maya’s skin weight tools, and then transfer that back (in-house format) to DCC tools (Max or Maya).
- Then send the whole model to Motion Builder for rigging and animation in Motion Builder, and via some custom code then export the facial rig from Max and also inport that facial rig into Motion Builder.
- Now it is time to add motion capture data. The body motion is transferred directly and the facial animation is transferred via the in-house Mocam tool again into Motion Builder.
- Then an animator reviews and starts polishing.
Inside the game the animation is driven by a couple of different systems, to deal with the NPC animation “there is a movement tree and movement graph, that is becoming more common in games that allows animators to go in and lay out what animations will play in what situations,” explains O’Sullivan. “‘When the game code says I am in this state – then I will play this…’ – so there are multiple layers of animation and blending – and some look up targeting for the faces and eyes that is all procedural.”
There are also cinematically scripted animation pieces which can be invoked to play out a small cinematic scene inside the general game play – “combining the two is what is providing us such variation in animation,” says O’Sullivan.
Of course characters need to carry props and interact with cars, trucks and a huge array of props. Props are on set and motion tracked by the mo-cap actors. Initially the animation model is very dense, and the animators have the chance to reduce model complexity if needed.
Workflow control of the whole process
The pipeline for processing the animations is based on Ubisoft’s Forge software which is an SQL database which interfaces with all the key production software. It literally controls all the cameras on the stage and it also manages the shot list. It passes the data to the Blade Software for tracking and controls scene assembly. Forge does scene assembly for the artists, handled via a batch form:
- Marker sets
- Actor mapping
- Import the 3D
- Character retargeting
- Video reference
- Mocom (face reference)
- Props Constaints and connections between props and characters
- Audio
Once this is done the editing team would adjust and make sure the results were creatively what was wanted. Central to this is the character pipeline being able to handle a wide variety of characters.

A sample of the key framed animals in the game
- tigers
- bears
- leopards
- panthers
- crocs
- sea turtles
- kimono dragons
- sharks and more
 Of course the characters also have a wide array of weapons, jeeps, cars and trucks to interact with.
Game production is as much a balancing act of resource allocation as actual game design is on real time performance or memory limitations.
Ubisoft has developed a tight and very effective pipeline for game character rigging and production that allows extensive and open world character animation on a wide scale.